How to Build a Home Flight Simulator in 2026: A Step-by-Step Guide
6 July 2021 | Updated on February 16, 2026
If someone had said a few decades ago that one could fly an airplane from their living room, eyebrows would have been raised, skeptical looks exchanged, and that someone would probably have been gently escorted away. Yet here we are, in 2026, doing just that.
Welcome to the era where ‘clear skies’ and ‘turbulence’ can be as commonly used at home as in the actual skies!
Home Flight Simulator Cockpits
Who hasn’t considered building his own airplane cockpit in the garage yet? The idea that you have a portable, fully-functional flight simulator in your home, with the controls and setup exactly like those of an actual airplane cockpit must be an exciting prospect to a lot of people. But, who has the first clue about how to even begin such a project?
The good news is that today there are many options for building a home flight simulator. Whether you’re looking to build one that’s realistic and fully-functional, or something more geared towards beginners and hobbyists, there are tools, resources, and step-by-step guides available to help you get started.
In this step-by-step guide, we’ll discuss how to build a home flight simulator, be it for flight training or just for fun.
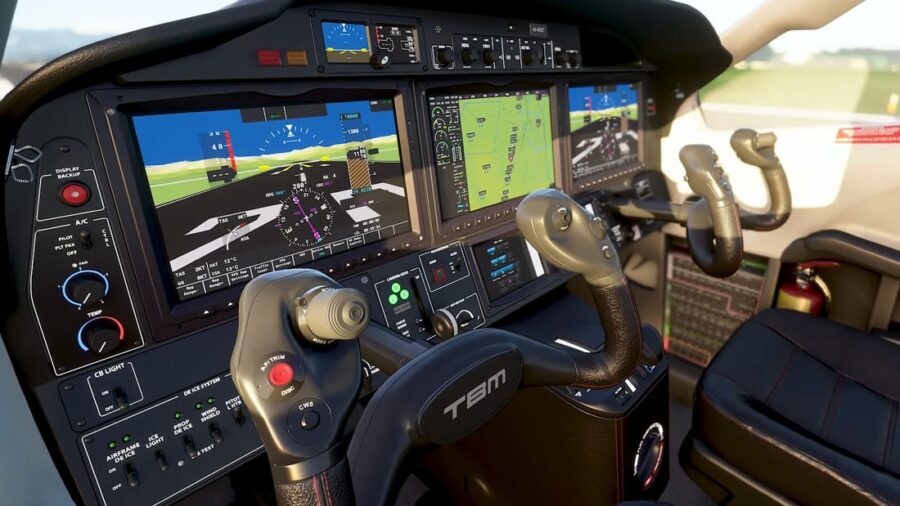
Step 1: What are your goals?
First of all, it’s important to make up your mind about your goals, before we start thinking about budgets, gear, software and setups, as this will all depend on what exactly you want to achieve with your home aircraft simulator.
People build home cockpits for all sorts of reasons. You have the aviation enthusiast who just wants to experience the joys of flying virtually for fun. These enthusiasts might be young kids, flying on their home computer with just a joystick and headphones, or they might be older people with larger budgets who recreated an entire B737 cockpit in there garage, beating many flight school simulator setups.
On the other hand, you have people like us, (student) pilots, who want to take maximum advantage of their time before and between flights to train procedures, navigation, or other skills, and which saves them tons of money in fuel and renting costs.
In this guide, we will focus on the latter, as most of our readers are either licensed or student pilots, who want to use their home flight simulator not only for fun, but also to train and improve their skills.
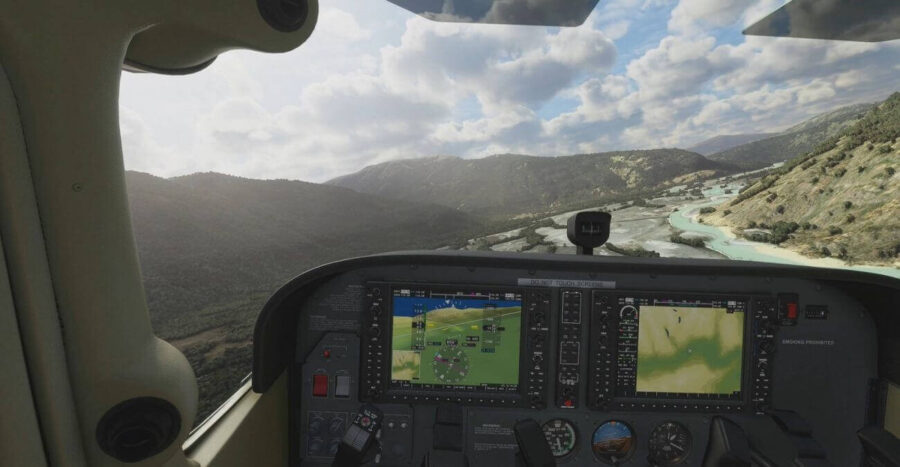

Step 2: What is your budget?
Before diving into the practical side of building your own home flight simulator, let’s first think about the numbers. Home flight simulators can range from a simple desktop-mounted joystick in front of a laptop, to entire cockpits that resemble the real aircraft. Of course, the total investment will increase depending on how advanced and realistic you want to make your home cockpit.
As we mentioned before, it’s important to think about what you want to do with your home flight simulator, your goals, and determine your budget correspondingly.
In this guide, we will discuss examples, ideas, hardware and software that will keep the total investment well under $10k.
Step 3: Some examples of home Flight Simulators
Next, it might be interesting to look at some great examples of people who have built awesome home cockpits. Some of the below examples may seem a little too over-the-top for you, but they might offer some extra inspiration for your own flight simulator.
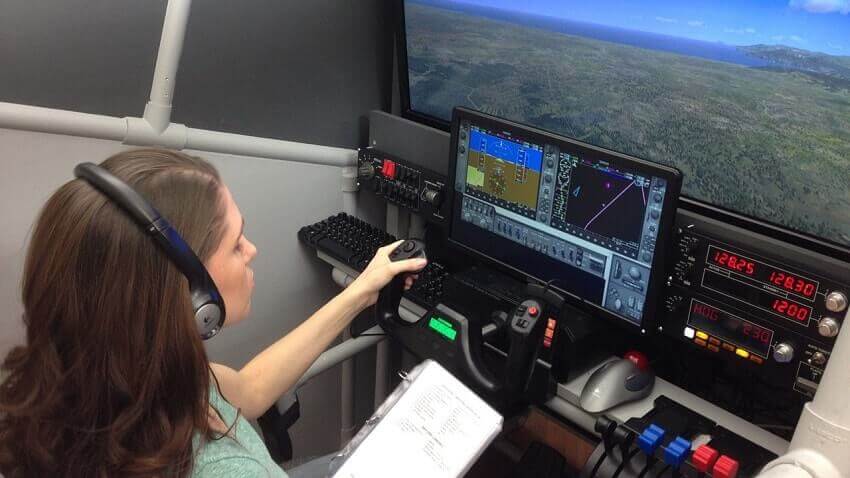

© Rodger Dodger Aviation
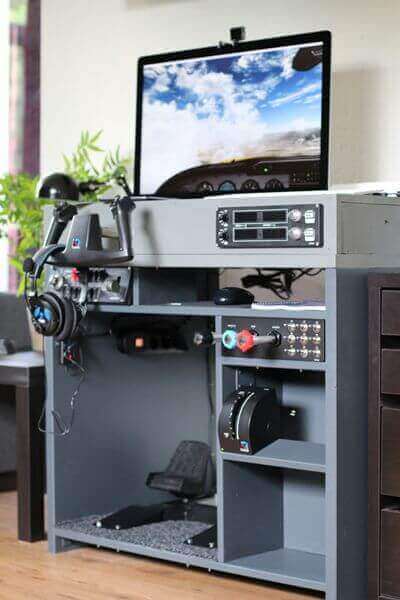

© uncertifiedpilot.com


© FlightChops
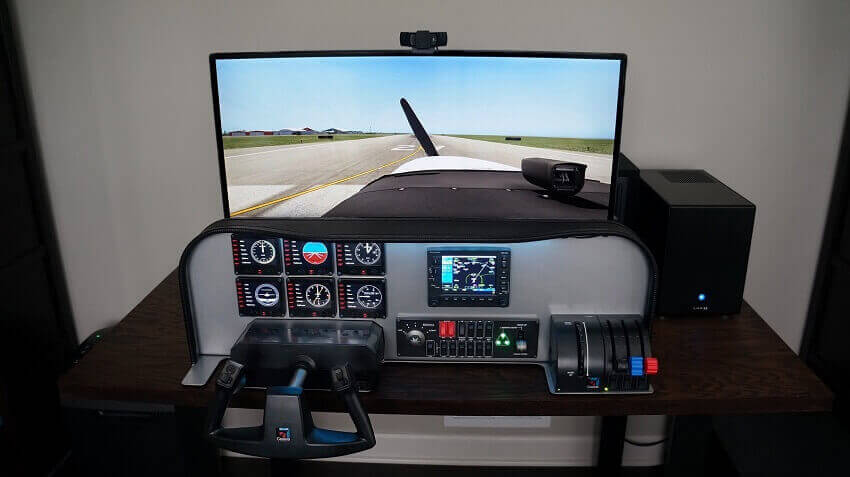

© Stay Level Avionix
You’ll notice the two first examples are custom-build cockpits, the two latter are based on a pre-made panel where you just need to insert your preferred hardware. As you can see, all 4 examples use the Logitech (former Saitek) flight simulator gear, but more on that later.
If you want to learn more about these examples, we have analyzed them in a different article, with a breakdown of the different components and costs. You can find that article here:
Step 4: Choosing the right Flight Simulator software
When it comes to flight simulator software, there are really only three options you should consider: X-Plane, Microsoft Flight Simulator or Prepar3D (pronounced “prepared”). All three great pieces of software, used by hundreds of thousands of users worldwide.
X-Plane
![]()
![]()
X-Plane is a completely stand-alone platform that was developed by Laminair Research and is growing from version 11 (current version) onwards because it has been embraced by Aerosoft. X-Plane is also the only flight simulator that is suitable for both PC and Mac.
What makes X-Plane 12 better than other software is that it does not carry the ‘burden’ of software from 2006. X-Plane is graphically stronger and especially with standard General Aviation aircraft the flight models are better developed, which only enhances the quality of the simulation.
Besides, the development of X-Plane is also fast: in every new update more functions are available, more scenery is created/enhanced and bugs are resolved. The developers of X-Plane have created a roadmap where they work towards developments and where they are transparent about which features are in the pipeline. The flight simulator software really becomes better and more complete with each update.
The downside about this software is that fewer add-ons are available for X-Plane 12 than for FSX/P3D and the addons are generally slightly more expensive than the average FSX/P3D add-ons. However, they are commonly considered as offering better value.


Buy now on Amazon


Buy now on Amazon
Microsoft Flight Simulator X


Microsoft Flight Simulator X is the most sold flight simulator software with the most active users worldwide. The MS Flight Simulator series, have been running since the 1980s, with its latest version released in 2006. Unfortunately, after two service packs, the decision was made that flight simulation no longer fitted within Microsoft, so further development (and bug-fixing) came to a standstill. That was until the licenses were taken over by the English Dovetail Games and FSX was reissued via the Steam platform as Flight Simulator X Steam Edition.
Why should you choose software that is more than 10 years old? The answer is actually quite simple; although the platform is somewhat outdated, the flight simulation community has been sitting anything but idle for the past ten years. Because FSX is the largest platform, the developers of add-ons have continued to develop for FSX and have become increasingly better at it. Because of this, most free and payware add-ons are available for FSX.
Another big advantage of FSX is the price. The basic set, without addons, is already available for less than $35.
To get the most out of your FSX learning experience, we also recommend ordering the book Microsoft Flight Simulator X For Pilots Real World Training.
Buy now on Amazon
Microsoft Flight Simulator 2020


Recently, Microsoft launched the newest edition of the Flight Simulator Series, MSFS 2020, which came in three different editions.
Microsoft Flight Simulator 2020 is the next generation of one of the most beloved simulation franchises. From light aircraft to wide-body jets, fly highly detailed and stunning aircraft in an incredibly realistic world.


Buy now on Amazon


Prepar3D
![]()
![]()
Prepar3D originates from Microsoft Flight simulator X, but was further developed as training software for professionals by aircraft manufacturer Lockheed-Martin. With this, the realism of the flight simulator has also greatly improved compared to FSX. Because the software is intended for professional use, it may not be used other than for training purposes.
Where FSX has stood still during development until very recently, P3D has been further developed, with the latest version 4 released in 2017. In P3D V4 there is support for 64-bit processors (nowadays the standard) and more attention has been paid to Virtual Reality. Although P3D has greatly improved over FSX, the basic simulation is still based on the 2006 simulator, which is why P3D is jokingly referred to by some as ‘FSX on steroids’. That the software is based on FSX becomes clear when you look at the user interface: it has remained (apart from the use of color) practically the same. But that same base also has its advantages, because it also makes many addons published for FSX work on P3D as well.
You can learn more about Prepar3D and order it here.
Step 5: The Flight Simulator setup
We have previously shown a few examples of great home flight simulator designs. These designs ranged from pre-manufactured laser-cut cockpit panels to mount on a table, to DIY-wooden structures, designed completely with your own needs and hardware in mind.
When it comes to building a flight sim setup, you generally have two options:
- Build your own DIY-cockpit from scratch
- Purchase a ready-made panel
Of course, each has its own (dis)advantages. Below, we will look at both options in more detail, with a budget example for both.
Option 1: Build your own DIY-cockpit
The first one is a nice example of what you can achieve with some planning, measuring, home depot tools and a few hours of your time. This ‘home cockpit’ was created by a Dutch guy called Tim, who shares his flight simulator experiences on uncertifiedpilot.com.
Tim created a great-looking custom-made wooden ‘desk’, fitted with custom compartments for all his gear, such as yoke, throttle, trim wheel, rudder pedals and more. As you can see on the below pictures, he first created a sketch of how he wanted the result to look and built the cockpit based on that design.


© uncertifiedpilot.com


© uncertifiedpilot.com
Now, what does it cost?
Based on the hardware that can be seen on the pictures, we have created an estimated budget below that can act as a guideline for your own project.
Two important notes: First, the Saitek/Logitech Cessna yoke, throttles and trim wheel have unfortunately been discontinued by the manufacturer, so we replaced them with the standard Logitech yoke and throttle quadrant in the below cost overview (you might still be able to find a second-hand trim wheel online). Also, the shown rudder pedals are not available anymore and were replaced by Thrustmaster TFRP Rudder pedals. Secondly, in this project, they used an Apple iMac computer to run the simulator and use as a monitor. However, to maximize compatibility with different hardware and software, we do recommend choosing a Windows-based computer.
In the cost overview, we based the price on an average iMac price of $2000, which is comparable to the price of a decent gaming PC plus a high-resolution monitor.
| iMac | $2000 |
| X-Plane 12 | $90 |
| Logitech Yoke + Throttle | $150 |
| Thrustmaster Rudder pedals | $120 |
| Logitech Radio Panel | $150 |
| Logitech Switch panel | $100 |
| Wood/Paint/Tools | $200 |
| Headphones | $100 |
| Total (estimated) | +- $2900 |
(All prices are estimates based on average retail prices in January 2026)
As you can see, this type of setup can be achieved already with a budget of around $3000. Of course, it all depends on exactly what computer you get, what hardware you’ll use, etc.
Option 2: Buy a ready-made panel
The second example we would like to discuss in detail is a home cockpit based on a ready-made desktop-mounted panel. (This is the same brand FlightChops used in his flight simulator videos)
The panels are created by a US-based company called Stay Level Avionix, which offers beautiful powder coated and plasma cut carbon steel flight simulator cockpit panels, completely tailored to the hardware you intend to use. They offer a variety of options, for small or large cockpits, ‘analog’ instruments or glass cockpit, multi- or single-engine aircraft, different yoke/throttle brands, etc. You can either buy a standard panel (you can choose between different setups like glass cockpit, steam gauges, Cirrus perspective, TBM,…), or have one custom-build based on your hardware.


© Stay Level Avionix
The model we want to discuss more deeply is the following:
Just like the one above, his setup is primarily based on the Logitech flight simulator hardware, all beautifully integrated into one desktop-mounted cockpit panel. This setup includes a six-pack of Logitech instruments (which could be replaced with a single LCD monitor mounted on the back), a Garmin G530 unit and Logitech yoke, throttle quadrant and switch panel.
Again, we have compiled a ‘shopping list’ to give you an indication of the estimated total cost for a similar project (trim wheel not included as it has been discontinued by the manufacturer, as mentioned earlier).
| Stay Level Avionix panel | $900 |
| Gaming computer | $1700 |
| Gaming monitor | $400 |
| X-Plane 12 | $90 |
| Logitech Yoke + Throttle | $150 |
| Thrustmaster Rudder pedals | $120 |
| Logitech instruments (6x) | $900 |
| Logitech Switch panel | $100 |
| RealSimGear GNS530 GPS | $400 |
| Total (estimated) | +- $4760 |
(All prices are estimates based on average retail prices in January 2026)
This setup is clearly a little more expensive than the one we mentioned before, but it does offer an extra level of quality and simulation experience. Nonetheless, you could get a similar setup for still under $5k, which is not bad at all we believe!
Want to look at more examples? Check out our article with 4 great examples of flight simulator setups, each with their advantages and a breakdown of the costs.
Step 6: Buying the right flight simulator hardware
Now that we’ve covered a few examples of great setups, their components and estimated budgets, let’s dive in a little deeper into the different options that are available when it comes to flight simulator hardware. We will discuss the most popular models and brands for each item, but in the end, it’s fully up to you to decide what you need and what your budget allows for.
Gaming Computer
Let’s start our discussions about hardware with the most important part you’ll need: the computer, which will be the heart of your simulator. When shopping for a good computer, it’s important to look for a dedicated gaming computer. You can either buy a ready-to-use gaming PC, or you can build your own from scratch. If you’re not that tech-savvy, we recommend just buying one that’s ready to use out of the box.
Now, what should you look for in a gaming computer to power your home flight simulator? You’ll need to get a fast CPU, lots of RAM and most importantly a great video card with lots of memory. A good guideline is checking out the recommended system requirements of the simulator software you want to use, and get just a little bit more than what they recommend, to allow for future versions of the software that might require additional capacity. The reason for this advice will probably become extra obvious once Microsoft releases its newest version of MSFS in 2020, which is ultra-realistic and will no-doubt require some high-end computer specs.
These are the system requirements recommended by X-Plane and MSFS:
X-Plane 12 system requirements:
- Disk Space: 25GB
- CPU: Intel Core i3, i5, i7, or i9 CPU with 4 or more cores, or AMD Ryzen 3, 5, 7 or 9
- Memory: 8 GB RAM
- Video Card: a Vulkan 1.3-capable video card from NVIDIA or AMD with at least 2 GB VRAM
Microsoft Flight Simulator MSFS system requirements:
- Processor: Intel i5-4460 | AMD Ryzen 3 1200.
- Memory: 8 GB RAM
- Graphics: NVIDIA GTX 770 | AMD Radeon RX 570
- Storage: 150 GB available space (MSFS is known for taking a LOT of disk space!)
Some examples of great gaming computers are the HP OMEN Obelisk Gaming Desktop (rated one of the top gaming computers of 2020 by techradar.com) and the iBUYPOWER Pro Gaming PC, both can be purchased on Amazon for around $1500-$2000.


Buy now on Amazon


Buy now on Amazon
Of course, there exist many other options on the market today, so you’re free to pick which one you like. As long as you adhere to the above-mentioned minimum requirements, you should be able to run most current flight simulator software smoothly!
Gaming monitor
The second most important piece of hardware will be the monitor, which will determine the quality of your view outside the virtual front window. In some simulator setups that you can find online or on YouTube, people sometimes use (a) projector(s) to display the world outside. In our experience and research, we concluded the best way to go is getting a decent high-resolution PC monitor. It will offer the best picture quality and gives you the most flexibility when it comes to setting up your home cockpit.
When researching which monitors are recommended for gaming, we came up with a list of three excellent gaming monitors, all named top gaming monitors by popular tech websites and received great reviews on Amazon. Our top three recommendations are the Sceptre 30-inch Curved Gaming Monitor and the LG 34GL750-B 34-inch Gaming Monitor. As you may notice, both monitors have sizes over 30″, which is what we recommend to get the optimal simulation experience.


Buy now on Amazon


Buy now on Amazon
Instruments and switches
To recreate and simulate a real airplane cockpit, we will need some (basic) instruments and switch panels. Depending on your budget these are a few of the options you have:
- A very simple home ‘cockpit’ with just a Yoke/stick, throttles and rudder pedals;
- A simple cockpit with, besides the basic controls, also some switch panels;
- A cockpit with controls, switches and basic physical instruments;
- Physical controls and switches, in combination with screen-based instruments (monitor placed behind the panel, no physical instruments hardware);
- A complete hardware-based cockpit, with more advanced instruments (such as a Garmin G1000/GNS530 replica);


For even more great instrument hardware options, we also urge you to check out RealSimGear, they offer beautiful flight simulator hardware such as a Garmin G1000 replica, Cirrus Perspective package, Garmin G5 replicas and more awesome gear!


Yoke/Stick
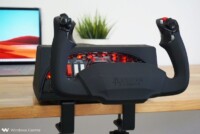
When it comes to flight sim yokes, there are only a few options on the market, but all work great. if you’re considering buying a ready-made panel, however, it’s important to consider compatibility. The Stay Level Avionix panel we mentioned before, is compatible with both yoke systems mentioned here.


Buy now on Amazon


You can read more about yokes in our dedicated Flight Simulator Yokes guide here:
Do you prefer flying with a joystick instead of a yoke? Maybe you’re considering building a more military jet-type of cockpit? Here are two great options when it comes to flight simulator joysticks!


You can read more about joysticks in our dedicated Flight Simulator Joysticks guide here:
Rudder pedals
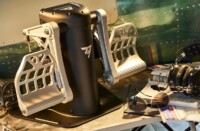
When you’re looking for some good rudder pedals for your flight simulator setup, Logitech is again a popular choice that pops up regularly. Their Pro Flight Rudder pedals are a decent product that offers good value for its price. If you’re looking for something a little more advanced, you can always go for the Thrustmaster TFRP Rudder pedals, which are slightly more expensive at about $210.


You can read more about rudder pedals in our dedicated Flight Simulator Rudder Pedals guide here!
Throttle
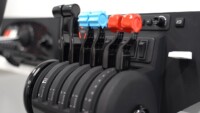
Picking the right throttle quadrant mostly depends on the type of aircraft you want to ‘fly’. If you’re planning on flying mostly twin-engine aircraft, the CH Products dual throttles may be a good option, or you could just go for two Logitech throttle quadrants (you can easily switch the levers and colors).
The newest flight simulator throttle on the market is the brand new Honeycomb Bravo, in our opinion one of the best pieces of flight simulator hardware available today! If you’re looking for the best and most realistic flight simulator throttle (and much more), look no further.
We also included Thrustmaster HOTAS throttles to complement the HOTAS flight stick for those of you who want a more fighter jet-like home cockpit.


Buy now on Amazon


You can read more about throttle quadrants in our dedicated Flight Simulator Throttle Quadrants guide here:
Sound
By now, we’ve talked about the look (monitors/software) and feel (hardware) of your simulator setup. A last important part that has a great effect on your simulation experience is sound. Hearing sounds and noises while flying in your simulator is essential to making the experience as real as possible. Both engine sounds, exterior sounds (wind, etc.) and interior sounds (warnings, switch clicks, stall horn, etc.) will be an important aspect of your home cockpit setup.
To get the most realistic experience, we recommend purchasing a 2.1 sound system with 2 stereo speakers mounted on both sides of your panel and one subwoofer to create a low rumbling bass that mimics the engine and airframe vibrations. A good gaming headset is also something that shouldn’t be missing!


You can read more about headphones in our dedicated Flight Simulator Headphones guide.
Other hardware
Besides all of the above, here are a few other products you could consider purchasing for practical reasons, or just to improve your flight simulator experience even more.


Buy now on Amazon


Buy now on Amazon


Buy now on Amazon


If you want to learn more about the best hardware and software for flight simulator, we highly recommend checking out our detailed article.
Some interesting reading material
Lastly, a great way to learn more about the infinite possibilities that a flight simulator offers, here are a few recommended reads:


Buy now on Amazon
Step 7: Think about the details to enhance realism
After setting up the basic structure of your home cockpit and flight controls, the next step is to enhance the realism and immersion of your flight simulation experience. As with lots of things in life, details make perfection. So it might be a good idea at this point to think about little details that can improve your flight simulator (learning) experience.
Real-world flying vs. simulation
- Comparing experiences: Understanding the differences and similarities between real-world flying and simulation can help in fine-tuning your setup. This might involve studying actual cockpit layouts and procedures to replicate them as closely as possible in your simulation.
- Achieving realism: Use resources like pilot manuals, online forums, and real-world flight experiences to inform your setup. Adjust your controls, seating position, and environment to mimic real-life flying conditions as closely as possible.
Environmental factors
- Lighting and room setup: The lighting in your room can affect the realism of your simulation. Consider using adjustable lighting to mimic different times of day and weather conditions.
- Soundproofing and acoustics: Good acoustics can enhance the sound quality of your simulation. Soundproofing your room can also prevent external noises from breaking the immersion.
Software settings and customization
- Flight sim software tweaks: Dive into the settings of your flight simulation software. Adjusting aspects like weather conditions, flight routes, and aircraft responses can make your experience more realistic.
- Custom scenarios and challenges: Create or download custom scenarios that challenge your flying skills and replicate real-world flight conditions. This can include emergency situations, varied weather conditions, and unfamiliar airports.
By incorporating these additional elements and paying attention to the finer details, you can elevate your flight simulation experience to new heights of realism and immersion!
A few other ideas that may add some extra realism to your setup:
- Mount LED lighting under your panel dashboard;
- Add button labels and panel decals that resemble real-life cockpit warnings, registration numbers or checklists;
- Secure all wiring to keep a clean and tidy cockpit environment;
- Prevent your office chair from moving with a simple rubber doormat;
- Add a document or tablet holder for displaying charts, checklists or other (training) documents you might need in the sim;
- Visit your local home depot: some wood, metal and paint can go a long way when building a nice home ‘cockpit’.
Step 8: Fly!
With the above-mentioned tips and examples, you should be able to build your very own home flight simulator setup, for well under $5k. Depending on your needs, of course, your budget might allow for a little more. In the end, it all comes down to what you plan on using it for, what you want to achieve, the available room for it in your house or garage, and of course, your budget.
We hope this guide has offered you the value you were looking for and wish you the best of luck (and a lot of fun!) flying in your new home simulator!
Cover photo © Stay Level Avionix
